Susan Nelson of Floyd County offers a great tutorial on how to make a face shield, which is more protective than a cloth mask. -promoted by Laura Belin
“Remember when the public health community and all ID docs said we could eliminate HIV with testing and contact tracing and we didn’t need to distribute and encourage condom use? Me neither #FaceShieldsForAll” ~ @eliowa
I am going to show you how to make a face shield that costs a couple of dollars, but first I’ll explain why you should want one.
Every day we find out about more frightening symptoms the COVID-19 virus causes, in all ages. Stopping the spread is essential to stopping mass death. We can stop the spread if we protect ourselves and each other. Many people cannot avoid being in public, like bus drivers, medical workers, and grocery clerks. Parents who have to go back to work need protection for their children and themselves. People in service industries, like salons and restaurants, need to be able to work with their hands on or near others without touching face masks that fall down or fog up their glasses. We need to be protected and to protect others.
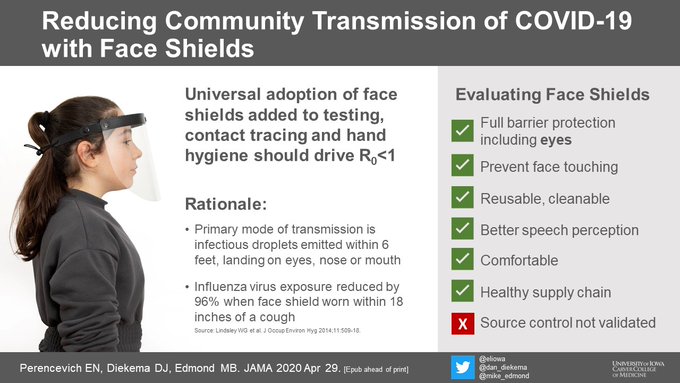
We get COVID-19 when airborne droplets carrying novel coronavirus invade our bodies through eyes, nose and mouth. Airborne droplets are created when we breathe, talk, yell, sing, cough, or sneeze. Most of them are taken down by gravity within six feet of the source, although the more forcefully air leaves your mouth, the further they will go. Sneezes can cross a room at 200 mph.
If the droplets hit a shield instead of your face, they can’t get in your eyes, nose or mouth. If you combine a face shield with distancing, hand-washing, and avoiding transferring viruses to your face from infected surfaces with your hands, you can be reasonably safe from getting sick. (Nothing is 100 percent effective, including vaccines.)
Why do we need face shields when we have masks? Masks do not protect eyes. MSNBC’s Dr. Joseph Fair (@curefinder) believes he contracted COVID-19 through eye contact while wearing an N95 respirator.
Outside of medical settings, most people do not have the most effective masks. Cloth masks help contain your droplets when you talk or cough, which helps to protect other people from you. They are less effective at protecting you from other people. COVID-19 particles are very small and can pass through cloth.
There are other problems with masks. They are hot and stuffy to wear, interfere with communicating, and most people do not know how to wear them without contaminating themselves with viruses that might land on the outer surface. They increase the frequency of face-touching, as people tug at them, pull them down to talk, and tuck them under chins (don’t do any of that). It is a challenge to keep them on young children.
Some people with disabilities find masks difficult to wear, or a barrier to communication. If you watch TV, you know that almost no one seems to know how to wear a mask correctly, from the Speaker of the House to journalists. Even Dr. Fauci touches his face, although who can blame him for the occasional involuntary facepalm?
For many people, a face shield is a better solution because it is comfortable, easy to put on and take off, cooler, and you can see a person’s mouth when they are speaking. Anecdotal evidence indicates that children are happier with shields. For journalists and police officers, it can provide increased protection when a deranged person is yelling at your face, and people in that kind of situation may want to wear both mask and shield.
Doctors Eli Perencevich, Michael Edmond, and Dan Diekema wrote about these issues in “Moving Personal Protective Equipment Into the Community – Face Shields and Containment of COVID-19,” which you should read and share. You can find them tweeting about how to stay safe: @eliowa @mike_edmond @dan_diekema. I am grateful for all the information they provide, and for their permission to use their graphic at the top of this post.
If you visit their facilities at the University of Iowa you will find that every person who works there is wearing a face shield. For more about assessing risks in your environment, read this.
Face shields are more readily available than medical-grade masks. You can buy them on line, and some people are 3D printing them. For this purpose, you do not need industrial-strength plastic and a helmet, so if you find one you like, buy it. If you buy one, make sure it covers your face all the way back to your ears, extends below your chin, and there is no gap between the shield and your brow. Wash your hands before and after handling the shield, and wash the shield after you use it each time, so you don’t infect yourself through contact.
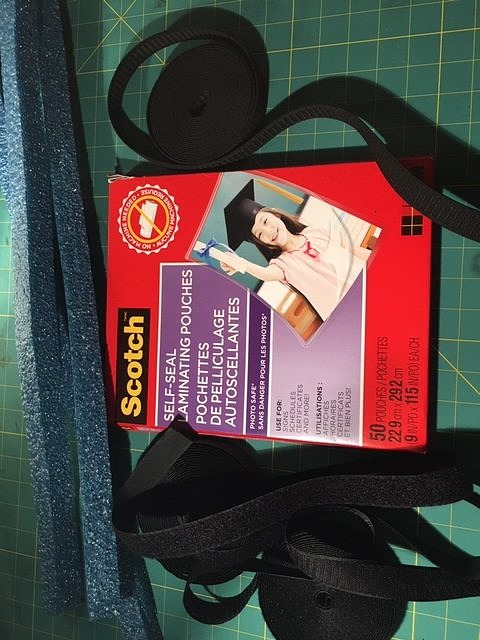
You can make a shield yourself with cheap, available materials. My version uses laminating sheets, elastic, Velcro, and polyethylene foam, and costs about $2. Here’s how:
Materials:
-
- clear plastic – I am using 3M laminating sheets. Any clear flexible plastic will work.
-
- a 12″ x 1″ strip of closed-cell polyethylene foam (you don’t want to use foam that will absorb sweat). This is the part that some people are 3D printing, using something that looks like a headband turned sideways instead of foam. Polyethylene is the kind of foam used for pool noodles. If it will float, it will not get soggy with your brow sweat. The blue foam in the photo is a bit stiff, and packing foam is softer, but harder to find.
- two 9.5″ lengths of 1″ wide elastic. If you have a large head, start with longer pieces. I used black so it won’t look dingy after you wear it a while. I used the kind of elastic for waistbands because it is strong and has enough stiffness to pull the foam back around your head.
- two 3″ lengths of 1″ wide Velcro
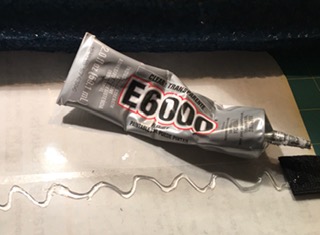
- Glue. I use E6000, which is very strong and dries clear, but any good adhesive would work. Glue sticks will likely melt the foam and/or plastic unless you let it cool a bit before you apply it. Experiment with scraps.
To make the mask:
1. The sticky long side of the laminating sheet, where the clear sheet is joined to the sticky sheet, will be the top of your mask. Using something round, like a tin can, mark the opposite corners that will be below your chin, and cut off the points. The reason for this step is to keep the points from sticking your chest. It is easier to see the marked line while the sheets are still together.
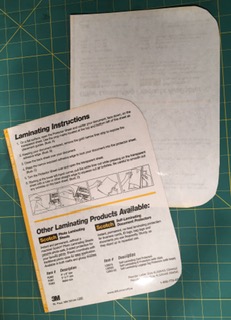
2. Separate the sticky sheet from the clear laminate sheet. I have not figured out anything interesting to do with the sticky side. Our lines are open.
2. Cut a strip of foam 1″ wide and 11.5″ long. Lay the foam on the plastic. When glued, the foam has to be positioned so that one of the smooth sides is against your skin. You may want thicker foam if you wear glasses. If you can’t find 1″ foam, use whatever packing materials are lying around in your garage. It is easy to make a a thicker piece by gluing strips together. That is what I did for my first few prototypes. The thicker it is, the more tension is needed to bend it around your forehead.
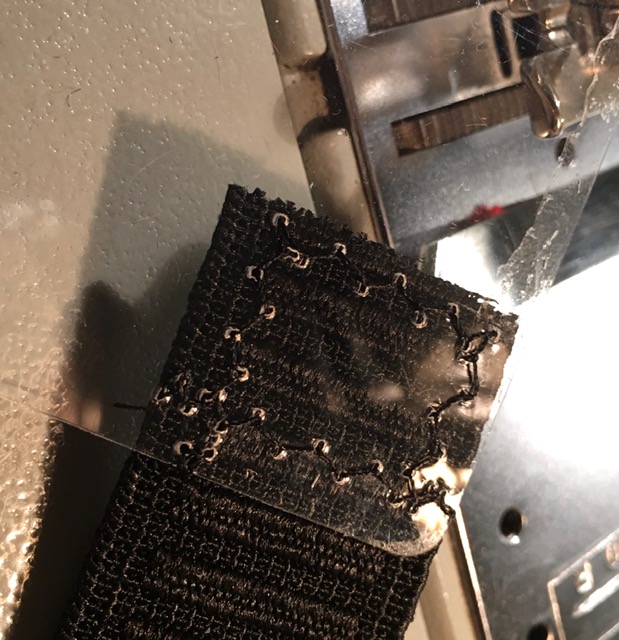
3. Separate the two parts of the Velcro strip and sew one to each of the elastic pieces, at one end. I use a zig-zag stitch to allow the elastic to stretch.
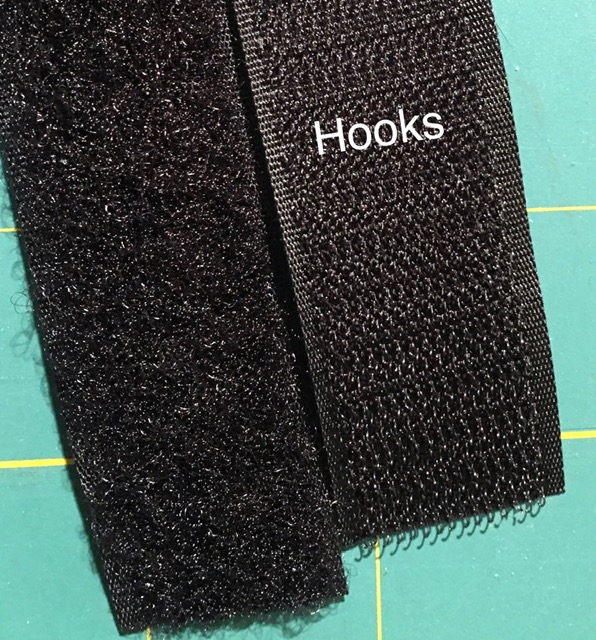
4. Try the fit. Using a pin, position the elastic ends without Velcro to either side of the plastic shield, at the top, on the side that still has sticky residue. There should be an inch of elastic overlapping with plastic. Make sure that the Velcro piece with hooks will be facing away from your head. With the elastic pinned to the plastic, hold the foam in place and try the mask against your head for fit. Adjust at the overlapping ends, if necessary.
5. Sew the two ends without Velcro to either side of the plastic shield, at the top, on the sticky side.
6. Put glue along the top edge. Lay the foam strip on it and put a weight on it while the glue cures.
Presto. It’s not beautiful, but it will do. 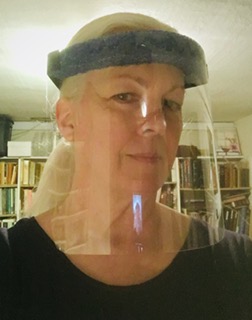
You don’t sew? Use one longer piece of elastic, no Velcro, and staple it instead of sewing. Use strong staples. Don’t forget you need to allow for the foam when you are measuring the elastic, and try it on to make sure it is comfortable before stapling. OR, use glue instead of thread, including with the Velcro. I have not tried it, but it should work. Use glue you can wash in hot water with soap.
I plan to wear this one until there is a vaccine, as long as it takes. Stay safe.